How to Winterize a Sprinter Camper Van
How to Winterize a Sprinter Camper Van
Photo by Pixabay
Winterizing a Sprinter conversion van properly can help to ensure the longevity and continued safety of its components. Winterizing your camper van is an important behind-the-scenes aspect of the #vanlife lifestyle! Keep reading to learn about important steps you should take to ensure that your van is ready for winter.
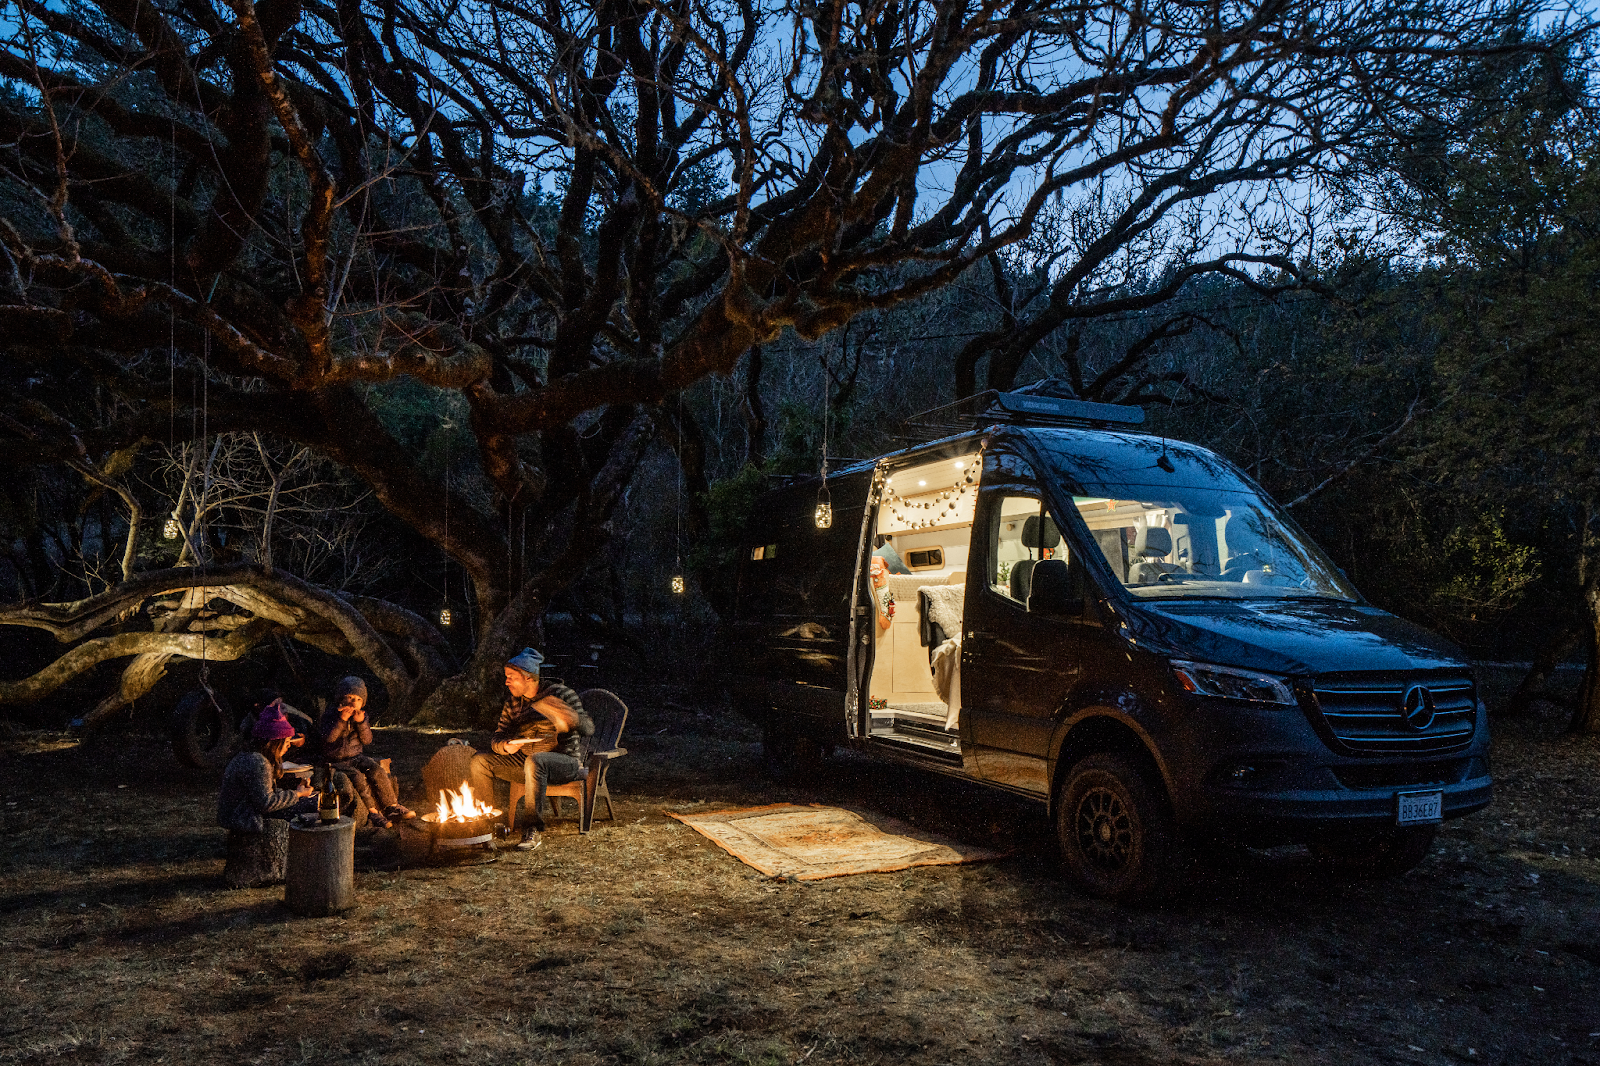
Photo by Muse & Co. Outdoors
Protect Your Water System
Your van’s water system is the top priority when it comes to preparing for winter. If you live in a climate that sees freezing temperatures, you need to take extra steps to protect the water system from damage. But even in more mild climates like the San Francisco Bay Area, you should take basic steps to winterize your camper van’s water system if you plan on storing the camper for longer periods of time.
To protect your Sprinter van’s water system during storage, you should:
- Completely drain the fresh water tank.
- Drain gray/black water tanks.
- Ensure water lines are clear by turning on your van’s water pump and opening all faucets.
- Drain any external water tanks, such as roof-mounted Road Showers.
In colder climates, take these extra steps to protect your water system’s components:
- Add a gallon or so of non-toxic RV antifreeze to your van’s water tank.
- Turn on the water pump to fill the pump and water lines with antifreeze.
- Turn off water pump and open faucets to allow for pressure release.
Follow the steps above to ensure that your van’s water system components are protected from freeze damage and/or build-up of algae and bacteria. When you take your van out of winter storage, it is a good idea to completely flush and clean the system with a small amount of bleach to ensure that your tapwater has no residual plastic or antifreeze taste.
Winterize Your Batteries
By taking the proper steps before storing your van for long periods of time, you can protect your auxiliary batteries from damage and extend their overall lifespan. Different battery types require different storage techniques. For example, AGM and lead acid batteries require the use of a trickle charger while in storage.
In this guide, we will focus on lithium batteries. Lithium is the best type of battery to use in a Sprinter van, and all Muse & Co. Outdoors vans come equipped with four top-of-the-line 100 amp-hour lithium batteries. Lithium batteries require very little maintenance, but you can take some simple steps to protect them before storing your van for long periods of time.
The most critical step to winterizing lithium batteries is to disconnect them from any parasitic loads. Before disconnecting the batteries, make sure they are fully charged. Many Sprinter van electrical systems will have an easily accessible battery disconnect switch. Others may have batteries that have an integrated switch with an option for ‘storage mode’, which accomplishes the same thing as a remote disconnect and simply isolates the batteries from its loads.
If you are storing the van for long periods of time in your driveway, you can use a trickle charger connected to an AC outlet to maintain the battery’s charge – just remember that your lithium batteries will not accept a charge at freezing temperatures. Trickle chargers are not required for lithium batteries and not necessary, so long as you follow the steps above and you are only storing the van for a few weeks or months.
Use a Fuel Additive
When storing a camper van for a period of months, you need to think about the vehicle itself as well as the conversion. One basic but important step to take when storing any vehicle for a long time is to add a fuel stabilizer. Fuel stabilizers protect your vehicle against potential damage that can occur when you leave fuel in your tank for long periods of time.
Keep in mind that many Mercedes Sprinters are diesel vehicles, and diesel has different requirements than gasoline when it comes to fuel additives and storage. In general, you can safely store high-quality diesel fuel for up to 6 months–so your Sprinter van should be fine during winter without any additives.
If your van is gasoline-powered, adding an applicable fuel additive to its tank before storing it for several months is a good idea. It will ensure protection against damage to engine components that can occur if you do not use an additive.
Other Storage Tips
There are a few more basic tips for winterizing your Sprinter van that are applicable to the storage of most vehicles. We recommend that you do the following when storing a van for months at a time:
- Use a cover: Covering your Sprinter van with a tarp or custom cover will help to protect all the seals and paint from weathering that occurs as a result of exposure to the elements. If at all possible, parking your van in a garage or carport is the best option.
- Protect against pests: Rodents and other animals would love to house-sit for you while your van is not in use. To protect against pest invasion, make sure to remove all food and food smells from your van before storage. Also, check on your van periodically throughout the winter to make sure no rodents or other animals have made nests in your engine compartment or elsewhere.
- Open your fridge: Your fridge seals shut, and it is nearly impossible to clean it well enough to protect against mold and odor build-up if you leave it shut. We recommend leaving the door propped open while the van is in storage to allow for air to circulate.
Winterizing your Sprinter Camper van is quick and easy, but these simple steps go a long way towards protecting your investment and ensuring the longevity of your beloved van. If you are in the market for a high-end Sprinter van conversion, be sure to check out our models. We are the West Coast’s premier Sprinter van builder, offering beautiful handcrafted builds with top-of-the-line components.
How Can I Make a Difference with my Camper Van? Introducing Nomad Net.
Photo by Muse & Co. Outdoors
How does this work, and what sort of impact can you make? Here’s their original blog post for more details.
Nomad Net: Joining vans, emergency response, and internet connectivity
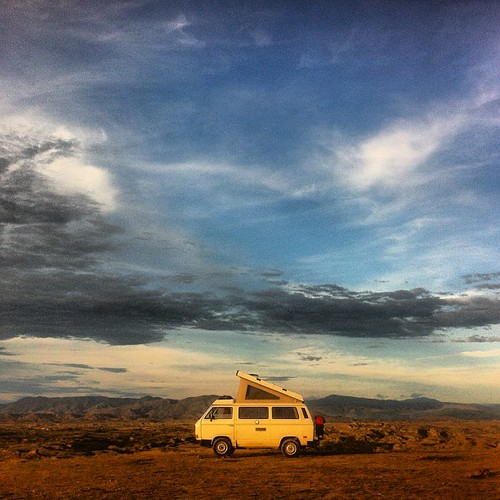
Photo courtesy of Nomad Net
We’ve learned a lot from each of these partnerships. Namely, that there’s no good source of reliable, high-speed Internet for folks with shaky finances and even less sturdy housing situations. This is especially true in the context of communities displaced by natural disasters. Often forced out of their homes at the last second, those fleeing disasters rarely have a chance to grab all the things required to help them recover wherever they may be riding out their displacement. You can’t bring your Comcast modem with you when your house burns down. Your laptop (if you have one) is unlikely to come along when you’re escaping from a flooding house. As essential as the Internet is, it’s not very mobile.
An immobile Internet means that millions of students a year miss school days because their school is inaccessible and no remote learning infrastructure is available. This educational loss is taking place right now in New Orleans. Hurricane Ida swept through a month ago, but more than 50,000 kids are still out of school — missing out on weeks of content after a year of disjointed learning. Even more loss took place back in 2017 when Hurricanes Harvey and Irma left nearly one in every six students out of school. And, educational loss due to natural disasters has set back students in communities across Oregon—that loss will only grow as natural disasters occur more frequently and with greater intensity.
Photo courtesy of Nomad Net
Satellite-based Internet is a paradigm shifter for disaster recovery. NGOs and government agencies, though, are under-resourced to bring this innovation into the field. Nomads, already a group that leans into the unknown, are up for the task. Those that join Nomad Net would receive a year’s worth of free Internet via a satellite-based company like Starlink or Viasat in exchange for answering three “Calls to Connect” a year. Calls would first go out to those Nomads nearest the areas designated by the Red Cross and others. If a Nomad couldn’t make that Call for some reason, then another Nomad would be mobilized. Once the Nomads arrived, they would be a game-changer for students like those in New Orleans.
Consider that each Starlink dish can provide speedy Internet to as many as 128 devices. So just a dozen or so Nomads parked near a displaced community could close the digital divide for everyone in that space. That’s right, all Nomads would do is park. In fact, it’s best for Nomads to stay out of the way as the Red Cross and others do their thing.
The good news is that companies like Starlink and Viasat are improving their technology everyday. So the capacity for Nomads to make an impact is growing. The bad news is that the current technology has some room for improvement — the dishes are as mobile as desirable and the Internet is not as reliable as hoped. Still, they’re building a better satellite-based Internet and we have to be ready to bring it to the areas that need it most.
That’s why NOLO is recruiting the first batch of Nomads. Would you sign up to receive a year of free Internet to serve as an Internet First Responder on a handful of occasions? Do you want to be on the frontier of innovations in disaster recovery? Are you committed to stopping disasters from disrupting the education of our students? Visit nooneleftoffline.org and help us show Starlink and Viasat that we’ve got a Nomad Net ready for them.
Click this link to sign up here.
How to Find a Sprinter Van to Convert to a Camper Van During the Chip Shortage
Photo by Muse & Co. Outdoors
So, what does this mean for your #vanlife dreams, and how can you still get your hands on a Sprinter van so you can start your build? Keep reading for answers to all your questions about the Mercedes Sprinter van shortage, including your best options for procuring a van in this competitive market.
Sprinter Van Shortage: The Basics
Sprinter van manufacturing is down significantly due to the chip shortage. This is presenting major problems for people looking to buy a Sprinter conversion van. Not only is supply down, but demand for Sprinters has skyrocketed in recent years; due mainly to the rise in popularity of #vanlife and converted Sprinter cargo vans, but also because of Amazon’s feverish purchasing of high-roof vans as they expand their Prime services.
The result of the drastically lowered supply of Mercedes Sprinter vans, coupled with increased demand, is that consumers are having extreme difficulty finding a van to convert into a camper. Currently, most Mercedes dealers are not accepting new orders for Sprinter vans, and any custom order placed is unlikely to be built because of the component shortages. Most dealers are still getting Sprinter vans, but the vans are coming in at a relative trickle when compared to the typical supply flow–and being bought up immediately.
How to Get a Sprinter Van to Convert to a Camper Van During the Chip Shortage
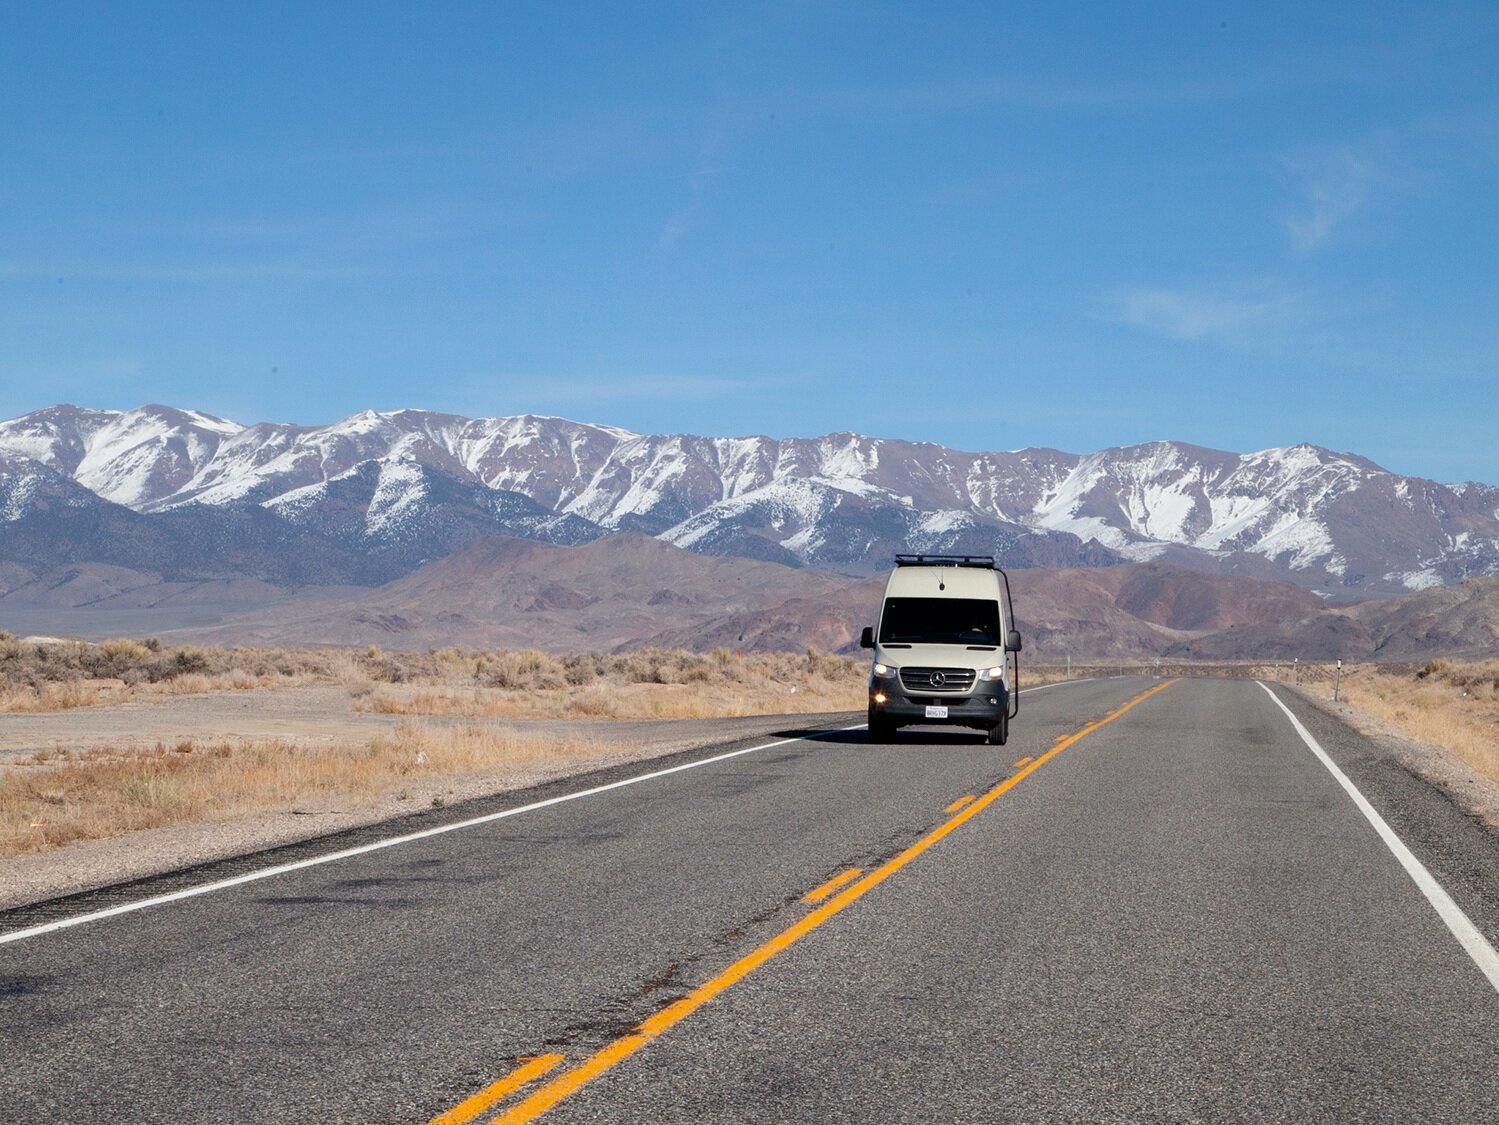
Photo by Muse & Co. Outdoors
As is so often the case, getting a Sprinter van in this market will likely come down to who you know. Fortunately, Muse & Co. Outdoors is extremely well connected within the nationwide network of Mercedes Benz dealerships. If you are looking for a new Sprinter van, we can help you by sourcing one from one of dozens of dealerships across the country, and having it delivered to our doorstep.
Not only is Muse & Co. Outdoors able to get you a Sprinter van, but we specialize in Mercedes Sprinter conversions and have a minimal waitlist compared to other builders. As the top Bay Area Sprinter van conversion company, Muse & Co. Outdoors builds craftsman camper vans that are as functional as they are beautiful.
You don’t need to delay your #vanlife dreams. Contact Muse & Co. Outdoors to begin planning your van build today. We offer conversion models for single travelers, couples, and families looking to camp comfortably in a Mercedes Sprinter. From van purchasing to custom conversion details, Muse & Co. Outdoors will be with you throughout the entire process to ensure that you end up with the Sprinter van of your dreams.
Mercedes Sprinter Features that Make Camper Van Life Safe, Fun, and Easy
Photo by Muse & Co. Outdoors
Still, when people think of a converted cargo van, they tend to think specifically of the Mercedes Sprinter. The Sprinter has built a reputation for itself as the best van for converting into a camper van. Among the reasons for this reputation are the loads of features that separate the Sprinter from other comparable vans. Keep reading to learn about some unique features and options that make the Mercedes Sprinter the best van for van life!
Optional 4×4
When you purchase your Sprinter van, you will have the option to choose either a two-wheel-drive or four-wheel-drive model. The Sprinter is still the only high-roof van sold in the U.S. that comes in available 4×4.
While 4×4 is an important feature for people who spend a lot of time driving in extreme winter or offroad conditions, keep in mind that even Mercedes’ two-wheel-drive system is more robust than that of most vehicles. Traction control systems help your 2wd van to stay on the road, even in tough conditions. Muse & Co. Outdoors offers suspension and wheel+tire upgrades for added clearance, stability, and traction. This can help your two-wheel-drive Sprinter to look and function much like a 4×4.
360-Degree Camera
The 360-degree camera is a Mercedes Sprinter feature that allows van owners to see a bird’s eye view of their entire van as they maneuver it in and out of tight spaces. While the Sprinter is quite nimble given its large size, the camera gives drivers an extra level of confidence when parking or driving on small dirt roads or trails.
Whether maneuvering your Sprinter out of a tight parking space in the city, or backing it into a narrow camping spot, the 360-degree camera gives you a view of your entire van’s footprint, as well as its surroundings, so you can be confident that you aren’t missing anything in blind spots. This feature is now being added to newer off-road specific vehicles, because it is so helpful in avoiding obstacles when driving on narrow trails.
Driver and Passenger Swivel Seats
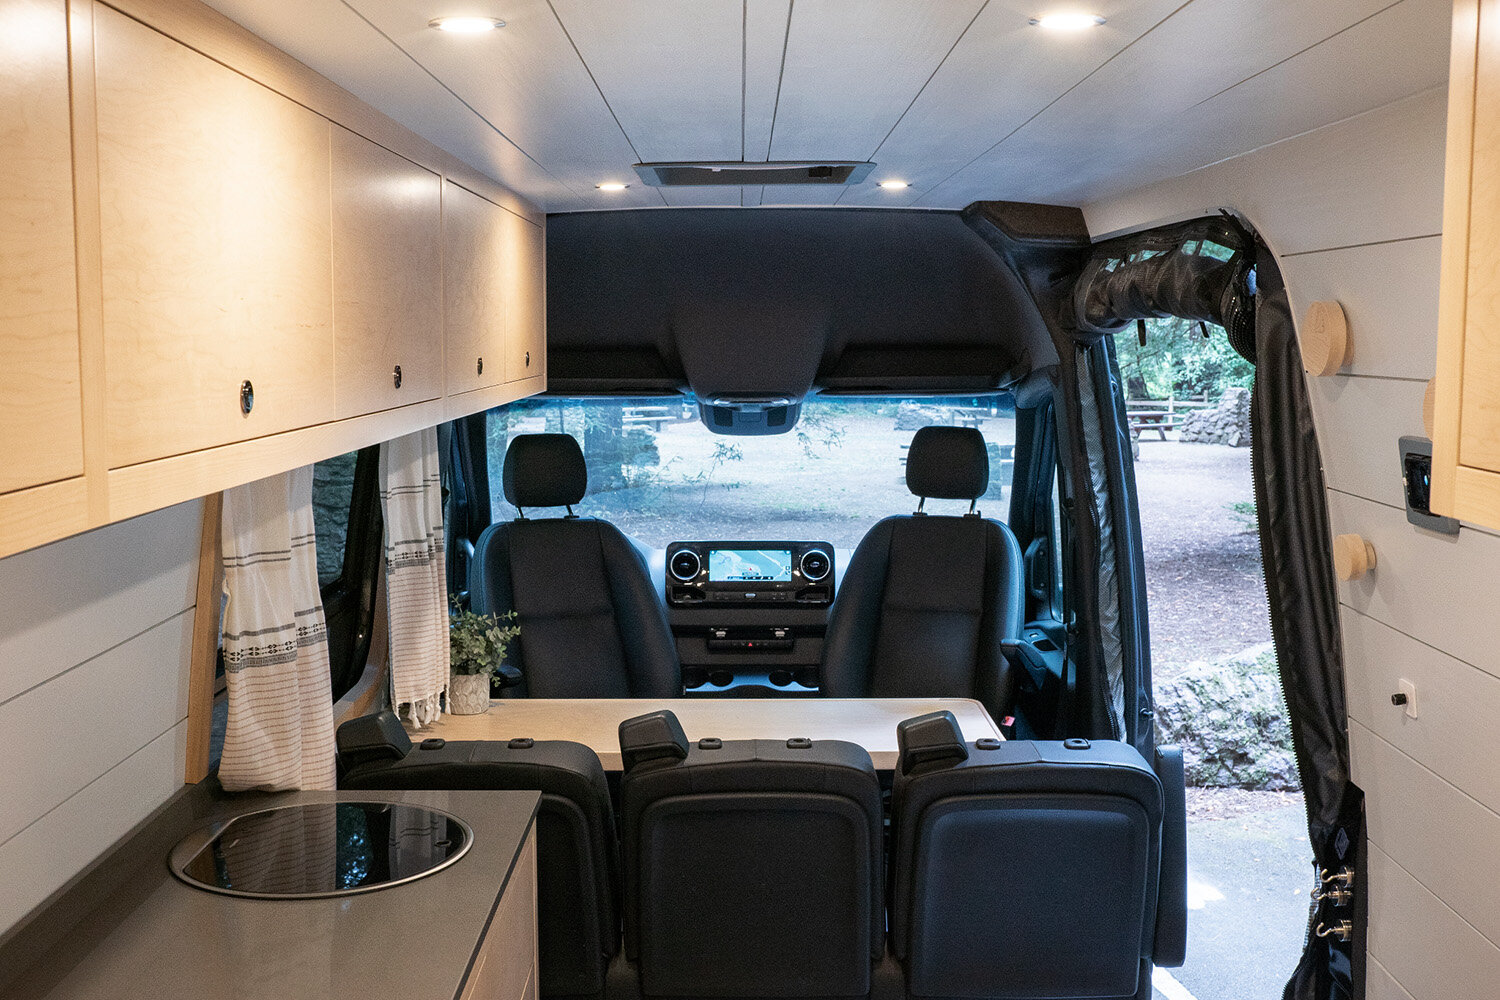
Photo by Muse & Co. Outdoors
While swivel seats are quite popular, there is little use for them in a van that is being used for cargo purposes. Mercedes, well aware that many van lifers are buying Sprinter cargo vans to repurpose them into campers, added swiveling driver and passenger seats as an available option in their vans. Factory seat swivels mean you don’t have to pay for the parts or installation costs of adding a swivel later on, and safety is not a concern, as all factory features must meet highway safety standards and fall within warranty specs.
Safety Features
Sprinter vans may be intended primarily for utilitarian purposes as cargo carriers, but they are still Mercedes vehicles, and owners can expect the same quality and many of the same premium features as are found on other Mercedes models. Among these are a long list of cutting-edge safety features that help to keep you, your passengers, and your precious camper van out of harm’s way. Below are some of our favorite Mercedes Sprinter safety features:
- Active Brake Assist: This system senses when a collision with a vehicle or object ahead is likely, and alerts the drivers visually and audibly, followed by taking control of the brakes if necessary to avoid an accident.
- Attention Assist: This unique Mercedes feature takes note of your driving patterns and provides an early warning if it senses driver fatigue. Very helpful for those long cross-country drives!
- Load-Adaptive Electronic Stability Program: This feature, which comes standard on all Sprinters, helps to stabilize your van by providing automatic individual wheel braking and reduced engine power in urgent situations, taking into account the load you are hauling in the van.
- Crosswind Assist: Another unique feature that comes standard on all Sprinters is Crosswind Assist. This feature helps to keep your van safely in its lane when traveling at highway speeds with strong crosswinds–something that can be difficult to achieve otherwise, given the large surface area of the side of your van.
Other Sprinter van safety features include Blind Spot Assist, Active Lane Keeping Assist, Hill Start Assist, and Rescue Assist. With these amazing safety features, and the convenience and comfort features of this luxury van, the Mercedes Sprinter is by far the most well-equipped van platform available for a camper van conversion. Head over to our model overview page to check out our Sprinter-based van builds.
5 Standard Features That Set Muse & Co. Camper Vans Apart
Photo by Muse & Co. Outdoors
We know a camper van conversion is a big investment, and it’s important to us that every van we make is of the highest quality and usability, without our customers needing to pay extra for added gadgets. Keep reading to learn more about some of the standard features that set Muse & Co. Outdoor camper vans apart.
Bedslide
Bedslide is a company that produces sliding platforms which are intended to make items in truck beds more easily accessible. The platforms sit in the bed of the truck, and slide out over the tailgate to make accessing the items in the front of the bed a breeze. Muse & Co. Outdoors vans come standard with a Bedslide in the garage storage area, which is accessible via the van’s rear doors.
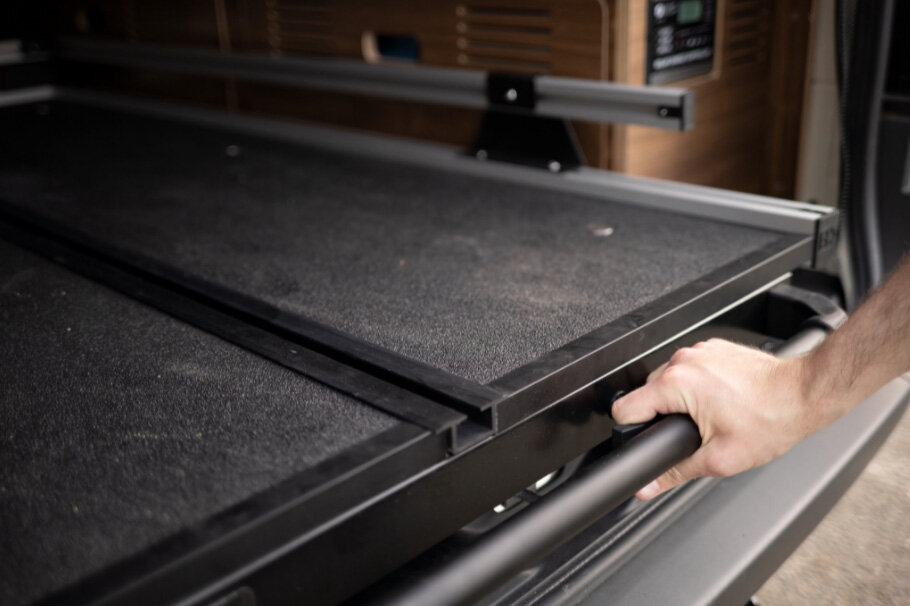
Photo by Muse & Co. Outdoors
Queen-Sized Casper Bed
The garage area is sleek, rugged, and functional thanks to the Bedslide, but it’s what sits above the garage in Muse & Co. Outdoors vans that puts the ‘glam’ in ‘glamping’. Every one of our vans includes a queen-sized sleeping platform, complete with a premium Casper mattress. The bed was one area we simply could not compromise on when it came to comfort.
Too many Sprinter vans host bed platforms with dwarfed dimensions that are cramped and uncomfortable. Vacations can only be so fun if you’re spending your days sore and unrested, which is why we built our vans around a bed that is just as comfortable as the one you have at home.
Premium Electrical Components
Camper van electrical systems play a big role in making these rigs a comfortable and convenient way to travel. Your van’s technology should enable and empower you to get out and comfortably enjoy the beautiful places you love; it should never get in between you and the natural world. We believe Sprinter van electrical systems do their best work behind the scenes; it is critical that they are reliable and operate smoothly, but the less maintenance and attention they need, the better.

Photo by Muse & Co. Outdoors
Indoor/Outdoor Cooking Capabilities
A major appeal of Sprinter camper vans is that they offer protection from the elements when the weather turns. When it’s rainy or cold outside, having a protected space to hang out, cook, and sleep can make all the difference. Still, camper vans are for getting outside, and when the weather is nice, the last thing you’ll want to do is spend time indoors.
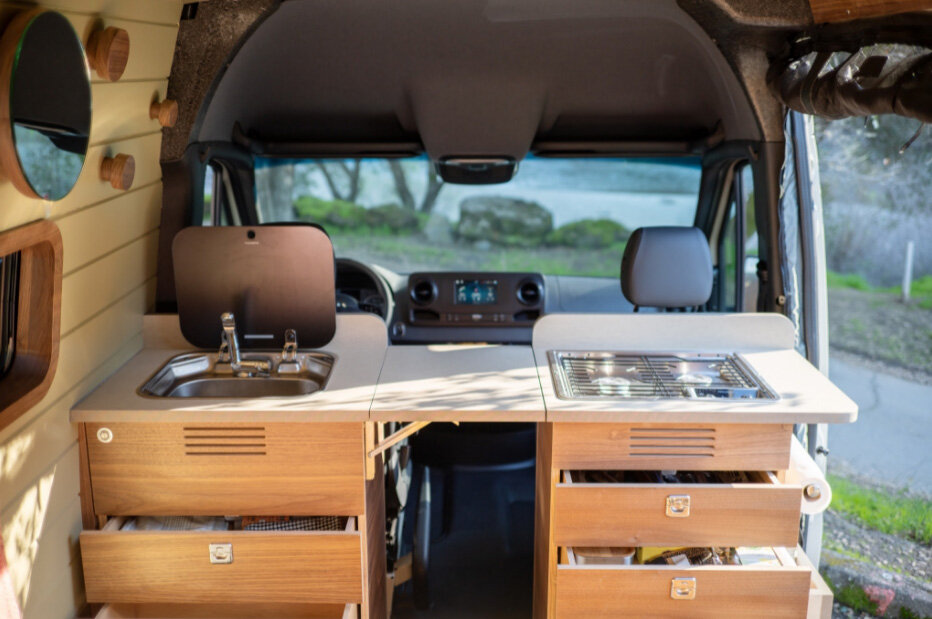
Photo by Muse & Co. Outdoors
Of course, both models make cooking inside a breeze as well. The Venture 2 includes an in-counter 2-burner stove and sink combo, while the Endeavor 5 features an in-counter sink or an optional sink/stove combo–with plenty of countertop space to cook indoors.
Green & Sustainable Materials
Muse & Co. Outdoors is 100% committed to making the health of our customers and the planet a top priority. Wherever possible throughout our camper van builds, we incorporate sustainable materials that are eco-friendly and unharmful to humans, without compromising on quality or functionality.
Among the green materials we use are zero-VOC interior paints and finishes, naturally-derived Marmoleum flooring, Paperstone counters and tabletops, and Havelock Wool insulation. Using these materials helps us minimize our impacts on the planet and ensures that our vans are a safe environment for you and your family.
How to Get Insurance for a Camper Van
Photo by Muse & Co. Outdoors
Register Your Camper Van as an RV
The first step in obtaining insurance for your Sprinter camper van may be a trip to the DMV. Since your Sprinter was originally a cargo van, it is probably registered as a typical passenger vehicle. If you want an insurance policy that covers both the van itself and the build inside, the easiest way to go about this is usually to first register the converted camper van as an RV, then obtain RV insurance.
Laws and procedures to register your van as an RV vary from state to state. In California, you’ll need to fill out a couple forms, take a trip to the DMV, and have the van visually inspected by a DMV staff member to confirm that it meets the state’s requirements to be considered an RV. Usually, this means it must have a place to sleep, a place to cook, and some sort of bathroom (even a portable toilet or an outdoor shower should work.) Really, the inspection is just a way for the state to have a staff member visually confirm that the vehicle is, in fact, built for camping and living, before they register it as an RV.
Personal, Renter and Commercial Insurance
Will you and your family be the only ones using your Sprinter camper van, or will you be renting it out on a rental site like Outdoorsy.com to generate income? The answer to that question will determine what type of coverage you need. Beware – many RV insurers will drop your policy altogether if you rent out your motorhome or camper. If you plan to rent your van at all, Roamly is one insurance company worth checking out, since it offers insurance for both the weekend warrior (defined as someone who uses their own van regularly, but doesn’t live in it for more than 6 months of the year) and those who plan to use their own van AND also rent their vans out to the public. (And if you happen to have a fleet of rental vans and rent out three or more vans regularly, they also offer an attractive commercial policy.)
Consider a Professional Camper Van Conversion
Are you still debating between a professional Sprinter van conversion company or a DIY build? Insurance may be the factor that tips the scales for you. Why? It is WAY more difficult to adequately insure a DIY camper van build than it is to insure a professionally built Sprinter from a certified camper van conversion company.
There are two reasons why this is the case. First, when you reach out to insurance companies to get quotes, they’ll want to be able to verify the value of your camper van. If you build the van yourself, the best you can do is to offer them receipts for the parts and materials. Since you’re not a professional camper van converter, your labor (likely hundreds of hours) can’t be easily valued and the insurance company may not want to insure the van for what you feel it is worth.
The second reason is related to liability. Camper vans have several potentially hazardous systems, including onboard propane and electric, not to mention cabinetry that must remain secure as you drive. Insurers may be reluctant to offer you a policy for a DIY conversion, simply because they can’t verify that the build is safe to use. They don’t want to be responsible if something goes wrong because of an error by the builders.
If you have your camper van converted by a professional builder, you can avoid these setbacks with insurance. It is simple to show the insurer how much the build-out is worth, including both materials and labor. Furthermore, builders follow strict protocols when it comes to safety, and this helps insurance companies feel more secure in offering you a policy that covers both the van and the conversion.
Photo by Muse & Co. Outdoors
Other Camper Van Insurance Tips and Tricks
- Check for deals. If you’re worried about the cost of insurance for your camper van, you might be pleasantly surprised. Since you’ll be insuring your van as an RV, this implies that you don’t drive the vehicle daily as a commuter. The less you drive the van, the cheaper insurance for it will be. If you have another car that you use to commute to work and drive around town, you might even be able to bundle your RV and car insurance to get more savings.
- Consider personal articles insurance. Personal articles insurance is a good way to make sure that all your valuables inside your van are insured, in addition to the van and build itself. This type of insurance is generally quite affordable and usually comes with no deductibles. You can use it to replace damaged or stolen items like clothes, cameras, computers, and even phones. This can give you some extra peace of mind while you’re traveling with valuables in your van.
- Ask your builder about insurance options. If you aren’t sure who to talk to about getting your newly converted Sprinter van insured, the camper van conversion company who built it out is usually a good place to start! Camper van conversion companies like Muse & Co. Outdoors often have insider knowledge about the insurers their customers usually use, and the local laws and regulations that pertain to obtaining insurance for your van.
How to Build a Green Camper Van
People who recreate in natural spaces regularly are significantly more likely to care about the environment and to take action to protect it. Camper van owners tend to be among the most active outdoor enthusiasts, and their vans are the tool that allows them to spend time in the beautiful natural locations they love the most.
Unlike the culture of motorhome or airstream camper trailer owners, custom Sprinter vans enthusiasts are all about getting out on road trips and immersing themselves in the outdoors. While people towing large travel trailers to RV parks are often simply looking to get away from home without sacrificing any comforts, most Sprinter van owners want to go “glamping” off-grid in beautiful and remote locations.
There are opportunities in several areas of a Sprinter camper van build to use green materials, but many conversion companies and individuals opt to use cheap materials that are harmful to the earth and to human health. Addressing environmental issues is a task that each of us must choose to take on. As lovers of the outdoors, it is the camper van community’s responsibility to make environmentally-conscious choices – including, but not limited to, the materials that go into their vans.
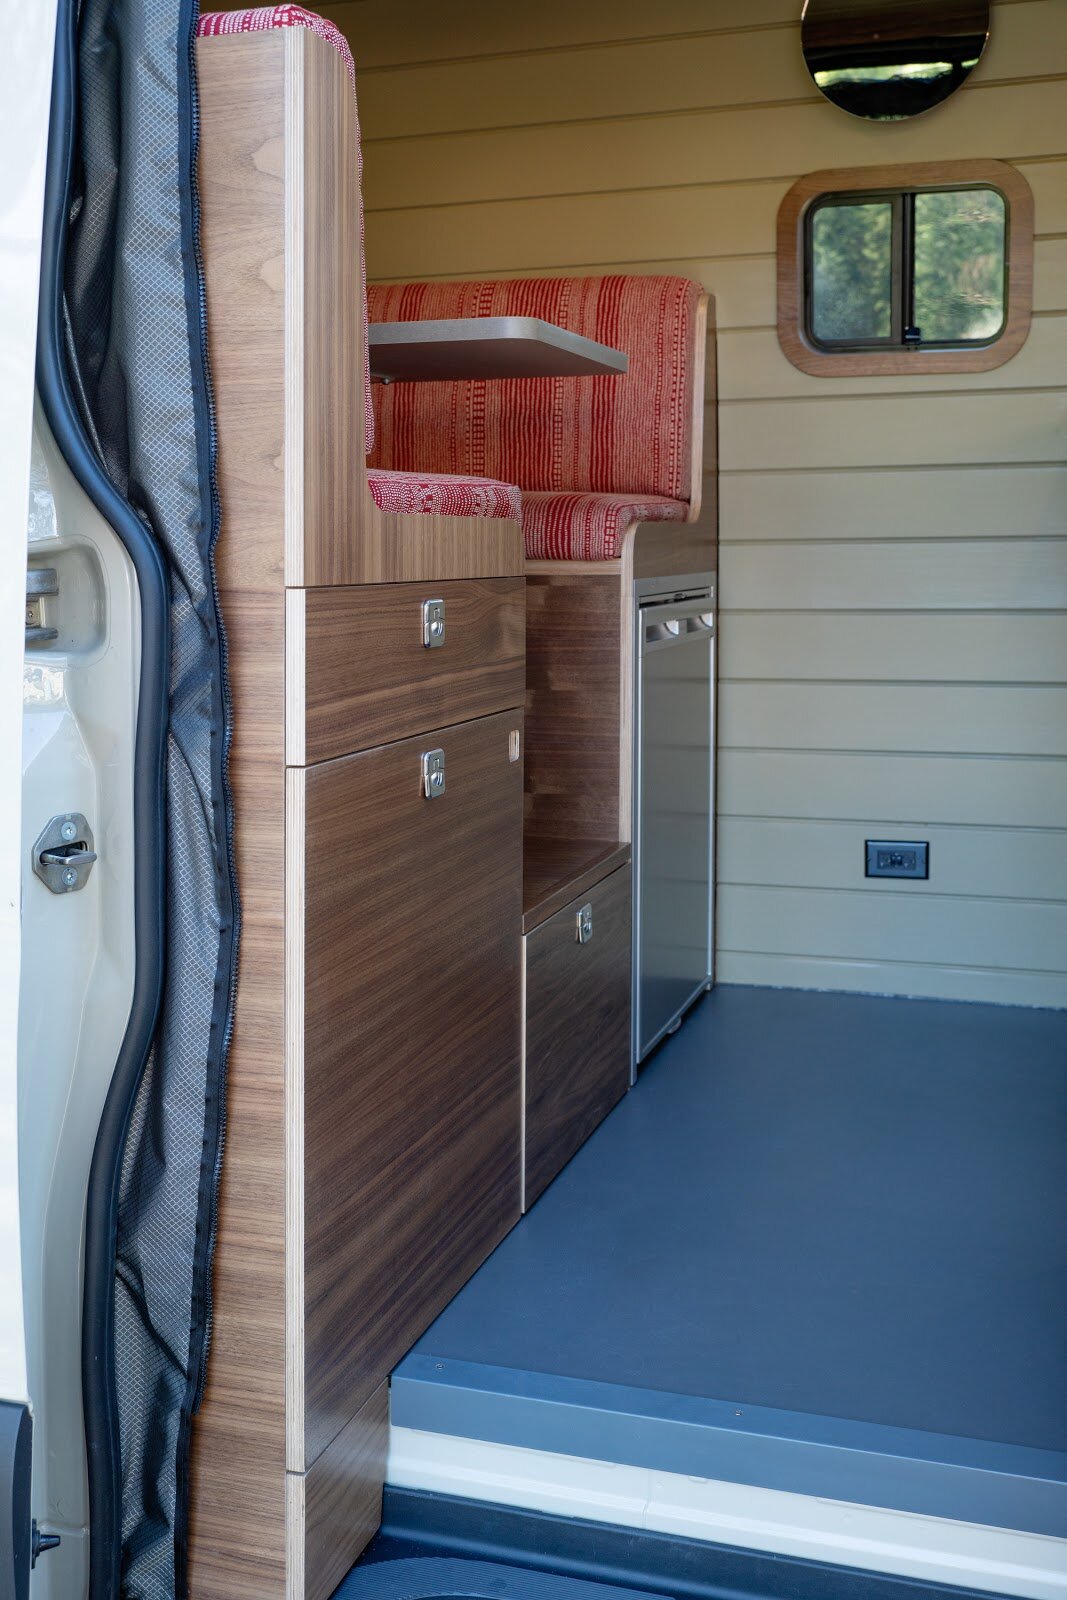
Photo by Muse & Co. Outdoors
Eco-Friendly Camper Van Flooring
Depending on your floorplan, flooring tends to be one of the first materials to go into a camper van build, and it’s also a ‘make it or break it’ decision point when it comes to the sustainability of a camper van build. Many flooring options contain toxic compounds or natural materials that are harvested unsustainably.
Flooring in recreational vehicles gets put through the wringer, with exposure to rapid temperature swings, lots of heavy foot traffic, and plenty of dirt and grime. Most van owners and builders aren’t willing to compromise on performance or appearance just to select a flooring material that is more eco-friendly.
Fortunately, flooring options exist that are both easy on the planet and able to meet the demands of a camper van environment. Muse & Co. Outdoors uses Marmoleum flooring in all of its builds. Marmoleum is a durable flooring material derived from linseed oil, which comes from flax seeds.
No toxins are used or produced during the Marmoleum manufacturing process. Like most environmentally-friendly building materials, Marmoleum is also non-toxic for humans and releases zero harmful gasses or chemicals. Marmoleum also repels dust and has antibacterial properties, making it a better option for sanitary purposes. Finally, Marmoleum is extraordinarily durable – and thanks to the curing process of the linseed oil, it gets more durable and tougher over time.
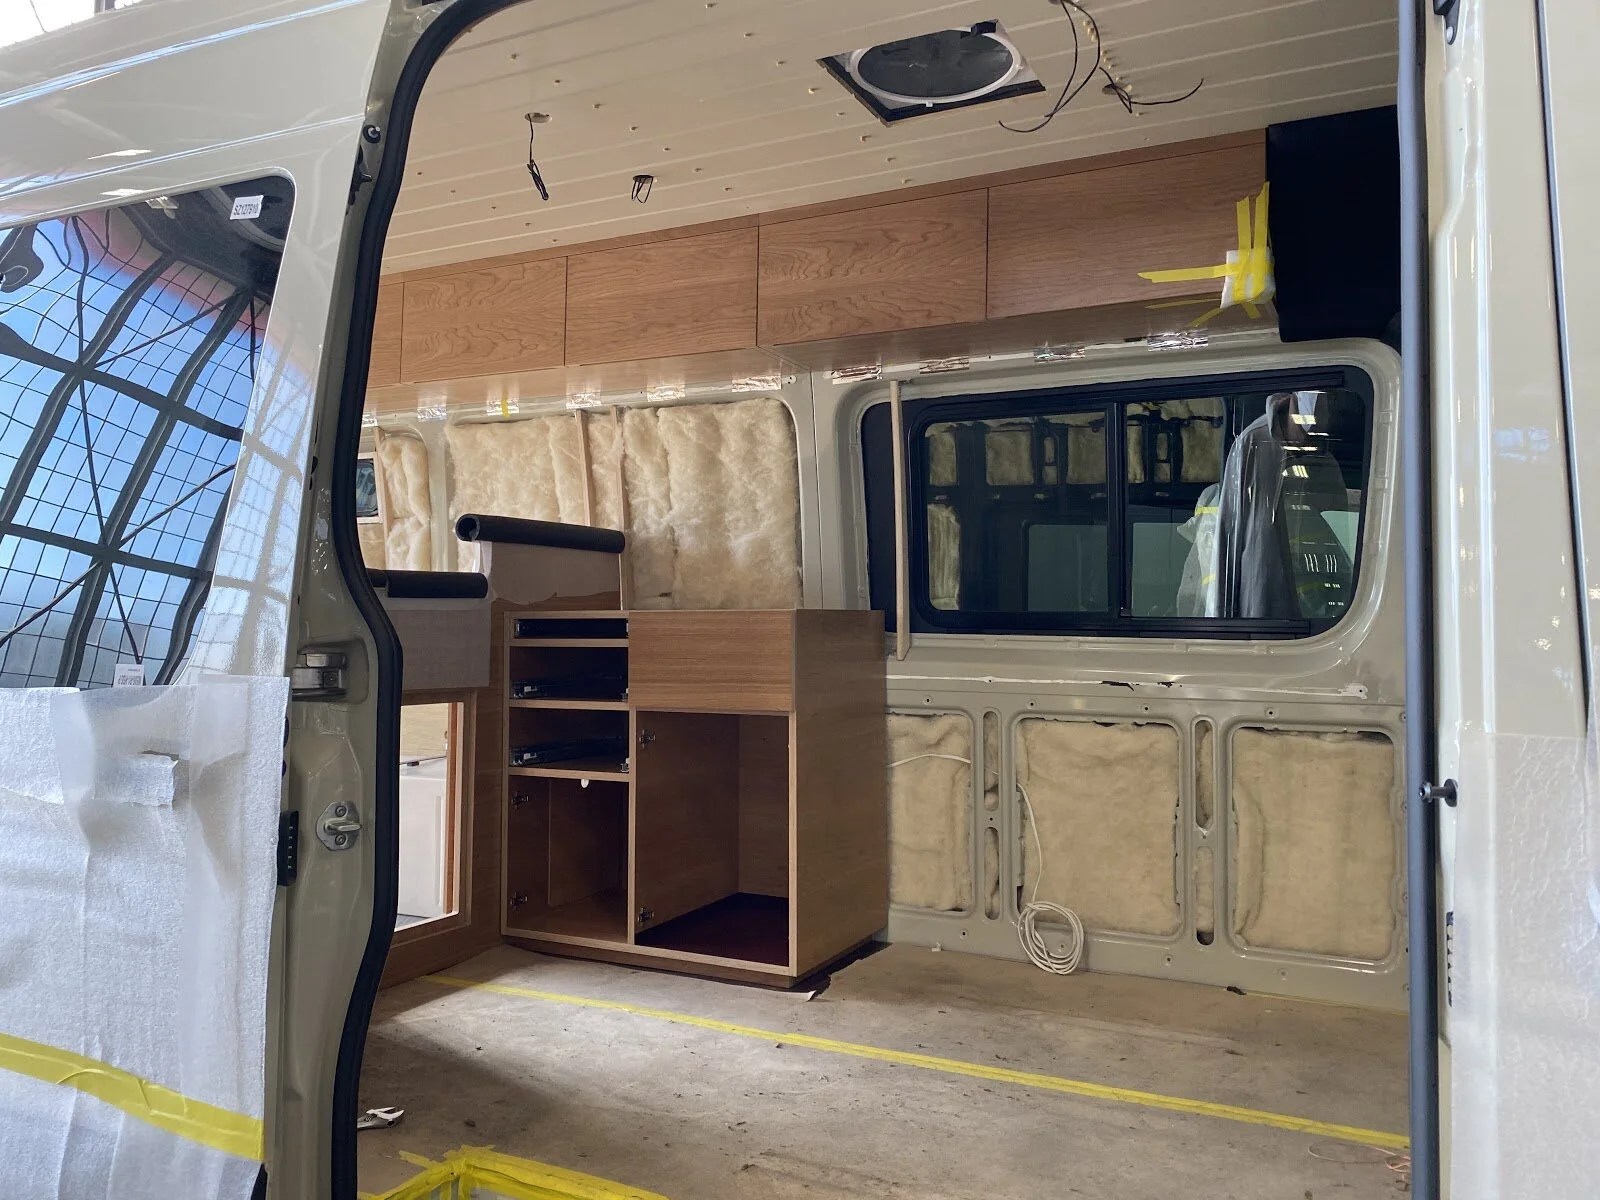
Photo credit: Muse & Co. Outdoors
Sustainably Harvested Lumber for Camper Vans
Wood is used extensively in most camper van builds. Just because wood comes from the earth doesn’t make it a green material. It’s critical to be conscious of how the wood used in your Sprinter van build is sourced.
Muse & Co. Outdoors uses sustainably harvested woods throughout our builds. There is no difference in quality or durability between sustainably-harvested lumber and lumber that is harvested using methods that harm the earth. Our shiplap siding is made exclusively from FSC-Certified pine wood.
If, like most camper van owners, you love to hike, bike, or otherwise enjoy the beauty of the America’s expansive forests, then you should also care about protecting them. Buying sustainably harvested lumber is a great way to avoid and actively fight against harmful logging practices such as clear-cutting.
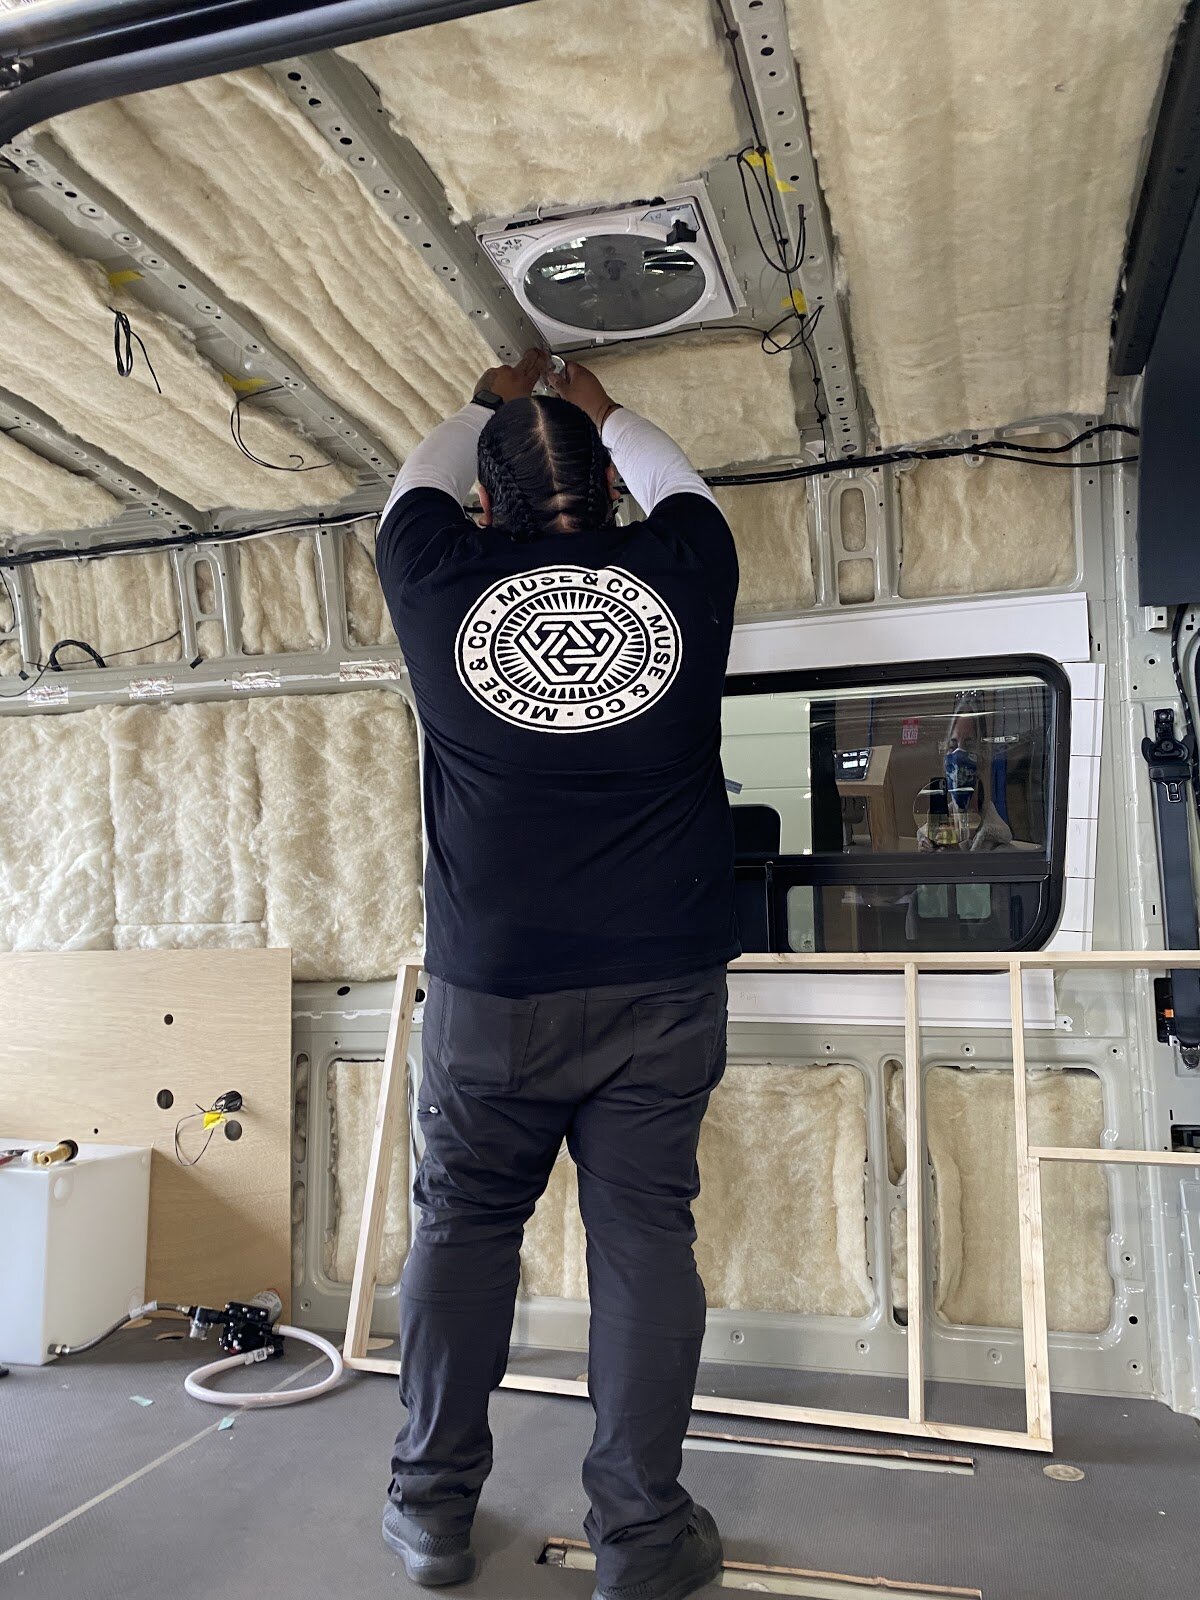
Photo by Muse & Co. Outdoors
Green Insulation Options for Camper Vans
Insulation is an essential part of any camper van build, and it’s somewhere you can easily make a big impact on the eco-friendliness of your rig. There are insulation options that are 100% renewable and sustainable, and there are others that are toxic to both the planet and to humans.
A camper van is a demanding environment that requires a high-quality insulation material capable of regulating both temperature and moisture. Fortunately, such a material exists that is also great for the planet and for your health. Muse & Co. Outdoors vans use Havelock Wool Insulation throughout the entire build.
Havelock Wool checks all the boxes when it comes to camper van insulation properties. It is fire-resistant, noise-mitigating, naturally moisture-regulating, and it is an extremely effective and efficient insulator. Plus, Havelock Wool contains zero chemicals or toxins, and it is harvested in a completely renewable, cruelty-free manner.
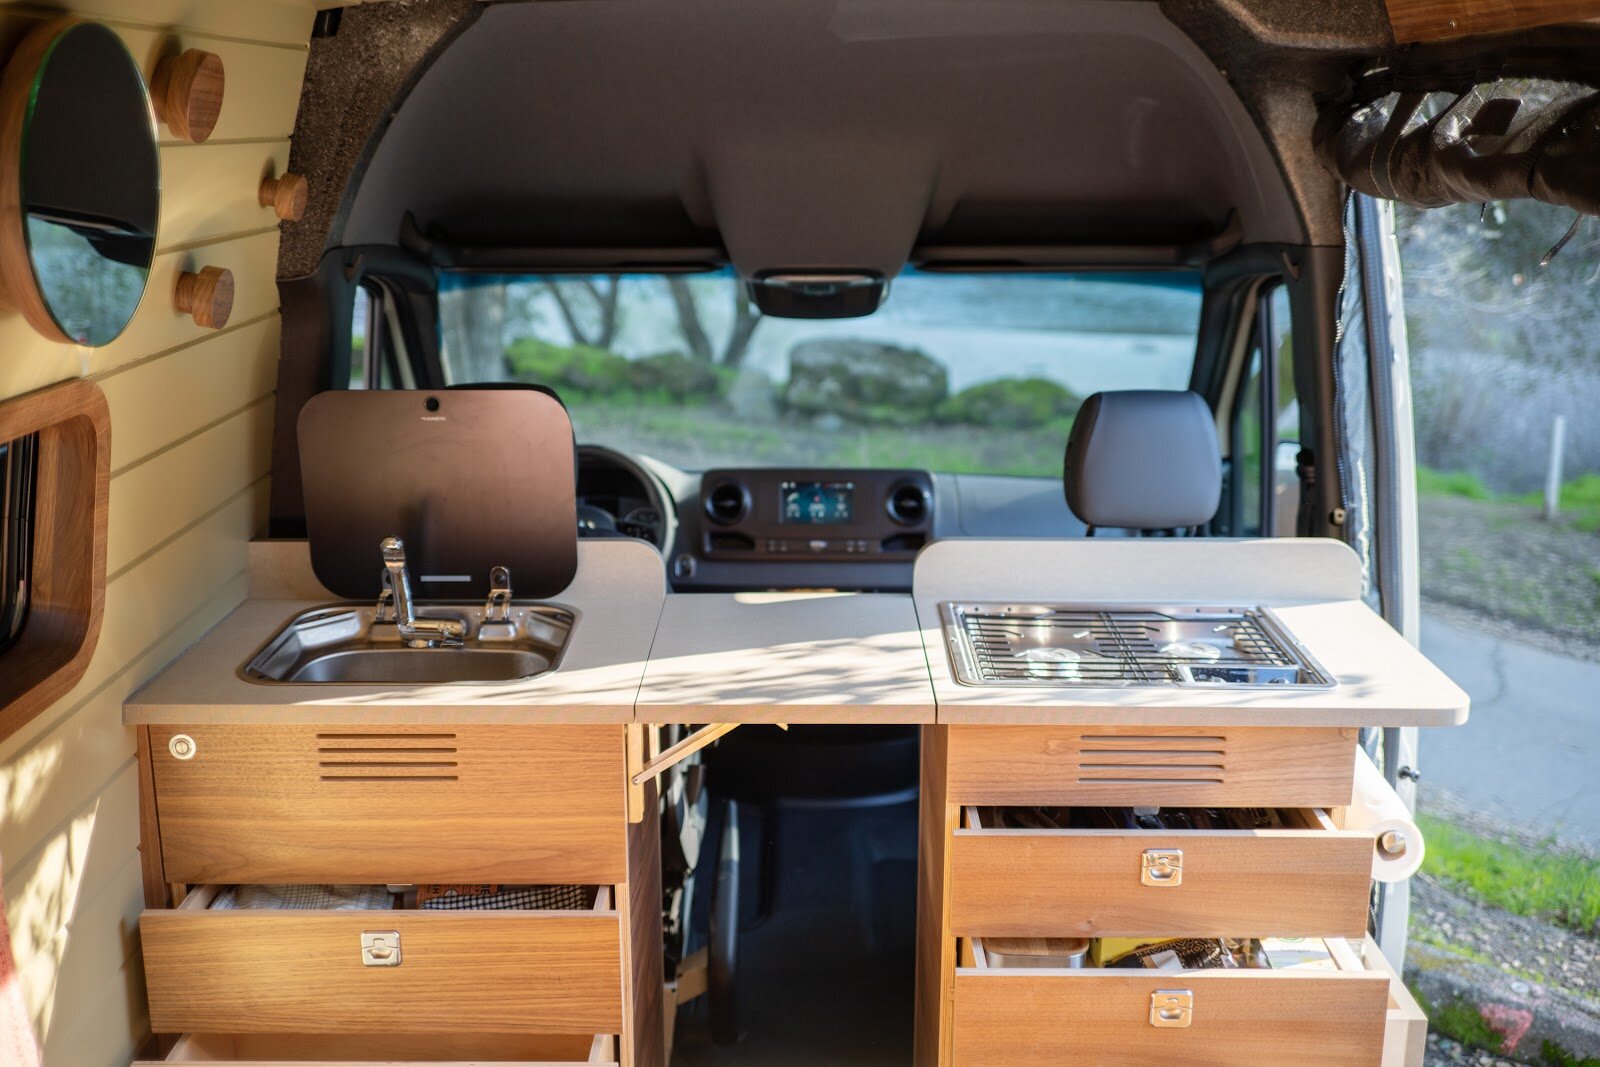
Photo credit: Muse & Co. Outdoors
Other Important Materials for Camper Vans
There are opportunities to improve the sustainability of a camper van in virtually every area of the build. Choosing low or no-VOC paints and finishes is an important way to protect the health of both the environment and the people who spend time in the van. Muse & Co. Outdoors uses Benjamin Moore Regal Select Zero-VOC paints. The wood cabinetry in our builds is finished using a UV-cured no-VOC finish.
Even materials like countertops can work to support, rather than degrade, our environment. Muse & Co. Outdoors vans utilize Paperstone countertops, which are derived from recycled paper products and non-petroleum resin.
Your electrical system can be made of certified green components, too. Our vans come equipped with solar panels and lithium batteries which improve energy efficiency by harvesting the sun’s energy, all while promoting growth in the green energy sector.
If you’re looking for an eco-friendly Sprinter camper van, check out Muse & Co. Outdoors. Our details page has more information about the materials used throughout our vans, and our Build My Van tool is a great way to visualize your Muse & Co. Outdoors van.
Why You Don’t Need a Shower in Your Campervan Bathroom
Photo by Muse & Co. Outdoors
Every decision on what features to include in a van build has major repercussions on other areas of the build. While it is possible to fit most of the amenities you’d find in an RV inside of a Sprinter van, some features are better left out to improve the overall functionality of the camper van.
One of the major debates amongst van owners and builders is whether an indoor shower is worth the space and resources it requires. Many van owners want a shower, especially those who live in their rigs full-time. A common “bathroom” includes campervan toilet options like a cassette toilet or composting toilet. But do you need a full wet bath with an indoor camper van shower?
We believe that when it comes to an indoor shower in a Sprinter camper van, the juice just isn’t worth the squeeze. Keep reading to learn why an indoor shower isn’t a great addition to your van, and find out about viable alternatives that avoid the major pitfalls of an indoor shower.
Space in a Camper Van is at a Premium
Let’s face it: while camper vans offer many amazing benefits over traditional RVs, they simply don’t have as much interior space. When deciding whether to include major interior components such as a full bathroom with indoor shower in this small space, one has to consider the impact it will have on the rest of the build.
If your bathroom design includes a shower, you will also need a water heater and a bigger fresh water tank to accommodate. Furthermore, you’ll need a bigger grey water tank, also called a holding tank, to accommodate the wastewater from a shower. These components can eat up living space and make your van’s floor plan awkward and cramped.
Indoor Sprinter camper van showers not only take up a massive amount of space and leave less room for other components, they also completely change the feng shui of your van’s interior by taking up so much vertical space from the floor to the ceiling. A shower will inevitably eat up space that could be used for your kitchen, a seating area, or storage. If your bathroom setup uses a shower curtain, you’ll need somewhere to store this wet and unsightly fabric while not in use.
Water and Power Usage
What good is an indoor shower in your van if it doesn’t provide a steady flow of hot water? While it isn’t impossible to outfit a van with a large enough power and water system to provide hot water for a shower, it is somewhat illogical to do so.
Most van users want a shower on board so they can rinse off while camping off-grid, away from established campgrounds and areas with available showers. A Sprinter van conversion must have a big enough water tank and enough off-grid power to supply and heat water for showers, as well as provide water and electricity to the other components on board.
To accomplish this, both the water and off-grid electrical systems of your van must be modified and oversized. Doing so can be very expensive and, in some cases, the extra solar power needed might leave little or no space for gear on your van’s roof.

Photo by Muse & Co. Outdoors
Inevitable Issues with Camper Van Showers
RV showers are notorious for causing owners major headaches, and there’s no reason to believe that those issues would magically disappear when indoor showers are installed in camper vans.
Even for the most expert camper van builders, issues like mold, leakage, and general repair problems are hard to avoid. Water has a way of finding every miniscule opening and penetrating, and trying to keep a shower system fully sealed in a moving, rocking, bumpy environment like a camper van is extremely difficult.
If you’re looking to have your Sprinter camper van built out by a professional conversion company like Muse & Co. Outdoors, you’ll find that most van builders offer warranties on the work they do. Unfortunately, indoor showers pose major warranty issues because of their susceptibility to leakage and other problems. Finding a van builder who will offer a warranty on a build with an indoor shower is difficult.
What’s the Best Camper Van Shower Solution?
By now, you’re probably tired of hearing about why you shouldn’t install a shower inside of your camper van. If you’re reading this article, having a way to rinse off on the road is probably a priority for your van build.
Fortunately, there is a great alternative to an indoor camper van shower that avoids all the aforementioned issues and provides reliable hot water showers wherever you go. Muse & Co. Outdoors offers Yakima Road Showers as an available add-on to your roof rack-equipped van.
The Road Shower is an ingenious solution outdoor shower solution for camper van conversions. Its simple design uses passive solar energy to heat water in a roof rack-mounted tank. The tank can either flow with gravity, or if can be pressurized with an on-board air compressor (or bike pump if you want to do it manually) and provides on-demand hot water through an integrated shower head when needed. More than one Road Shower can be installed and plumbed together so you aren’t limited to 10 gallons of warm water. Many owners of Muse & Co. Outdoors vans that are equipped with a road shower like to accessorize with a free-standing pop-up shower stall so you can shower right outside your van in privacy.
The Road Shower is independent of your van’s water and electrical systems. It takes up no space on the interior of your van and avoids all of the potential nightmares of an indoor shower. When you consider all of these points, the Road Shower is a no-brainer alternative to an indoor camper van shower. Road Showers are popular on class B camper vans, offroad vehicles, airstreams, travel trailers, and other small road trip-mobiles.
The Best Ways to Make Coffee in Your Camper Van
Photo by Muse & Co. Outdoors
One of the only ways to make coffee even better is to enjoy it while looking out at your favorite view from the comfort of your camper van. And just because you’re camping doesn’t mean you’ve got to compromise on making a great cup of coffee in the morning.
You might not be able to bring your home espresso machine along for the trip, but there are still some ways you can make great coffee while on the road in your van. Below are some of the Muse & Co. Outdoors team’s favorite methods and tips for brewing excellent coffee in our camper vans.
Grinders
The first step to any good cup of coffee is freshly ground beans. Of course, you can bring along pre-ground coffee on your trip, but once beans are ground they begin to lose their freshness very quickly.
All coffee grinders are not created equal. What separates grinders is their ability to produce uniform coffee grounds, where there is minimal variance in the size of each ground. You’d be amazed at how much the grinder can affect the taste of your coffee. It’s likely that your favorite local coffee shop spent thousands of dollars on their grinders!
Of course, you won’t be bringing along a large, expensive electric coffee grinder in your camper van. Fortunately, there are some great options for compact, cheaper grinders that are ideal for making great coffee in your van!
Our choice for camper van coffee grinders are handheld burr grinders. These compact little coffee grinders take up almost no space in your van’s cabinets, and thanks to the burrs that grind the coffee, they produce reliably uniform coffee grounds! They operate using a hand crank, and are adjustable so you can make the grind finer or more coarse for different brewing methods. It might take a couple of minutes to grind enough beans for your morning joe, but we think that the (bean) juice is worth the squeeze!
French Press
French presses have been a favorite brewing method among campers and coffee enthusiasts for decades. These simple devices produce reliably strong and tasty coffee, and the lack of disposable filters means less trash and a more eco-friendly brewing method.
To make coffee in a french press, it’s usually recommended to adjust your grinder to a coarse setting. Since the coffee and water will brew for a few minutes, the coarse grind helps to slow down the extraction process. To brew coffee with a french press, you simply place your grinds in the bottom of the device, add hot water over them, allow them to brew for about 4 minutes, then ‘press’ the mesh filter all the way down to separate the grinds from your coffee. About two tablespoons of ground coffee per 10 ounces of water should give you a strong but balanced cup.
In a camper van, it might be wise to choose a french press made of all metal, rather than one with a glass cylinder, to ensure that the device doesn’t shatter in your cabinet on bumpy roads.
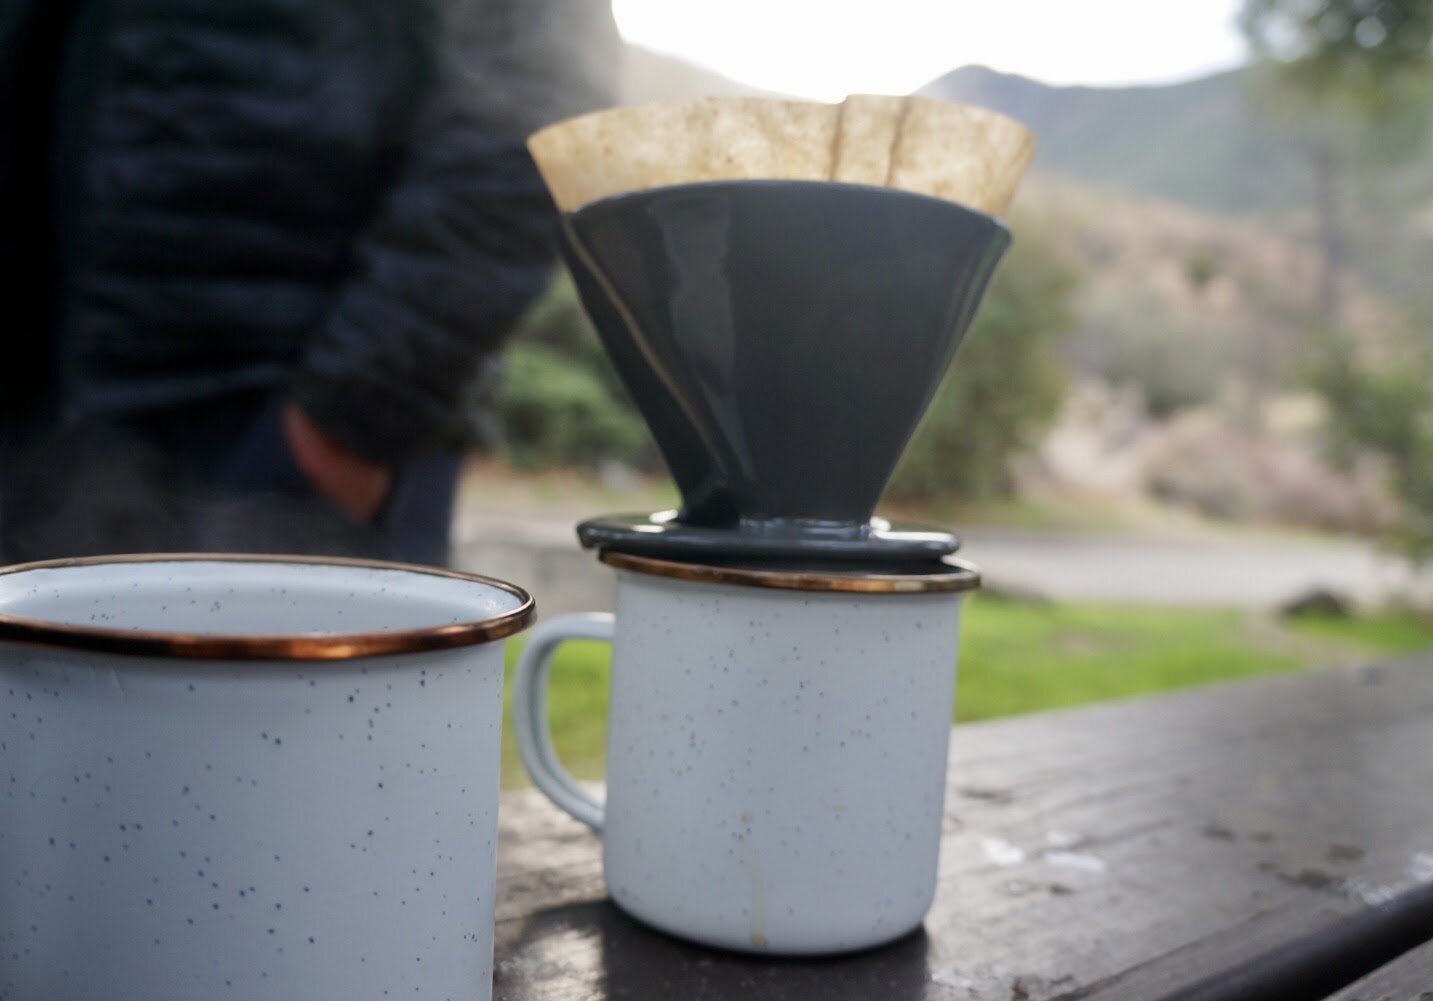
Photo by Muse & Co. Outdoors
Pour-Over
You can’t walk into a hip coffee shop anymore without seeing pour-over coffee on the menu. Pour-overs have become a favorite method of extraction among coffee enthusiasts because they do a great job of highlighting the unique flavors of a given coffee.
Pour-over coffee makers are best used with medium and light-roast coffees, which have more nuanced flavors that can be teased out with the right brewing method. And guess what? You can reliably make coffee shop-quality pour-over coffee while on the road in your camper van!
All you need to make pour-over coffee is your grinder (set to a medium grind), your pour-over cone, and paper filters. A water kettle with a long, skinny spout can come in handy, but any kettle with a spout that allows you to pour the water at a steady rate should work fine.
Once you’ve got the grounds in your filter, place the filter in the pour-over device and set it over the top of your mug of choice. Pour the water over your grinds in a slow, circular motion for an even extraction!
Making a perfect cup of pour-over coffee can take a bit of fine-tuning when it comes to the size of your coffee grounds, the temperature of the water, and your coffee-to-water ratio. Once you’ve got your method down, though, this can be one of the best ways to make gourmet coffee while you’re on the road.
You can find pour-over coffee cones in just about any material you could imagine, from plastic, to ceramic, to metal or glass. We recommend choosing a pour-over cone for your Sprinter van that isn’t easily breakable, and that fits over the top of your favorite travel mug!
Stovetop Espresso
To some of us, ‘coffee’ really means ‘espresso’. If you prefer your coffee in this extra concentrated form, there’s good news: You don’t have to sacrifice your morning (or afternoon) espresso while you’re on the road in your Sprinter camper van.
When it comes to espresso, all you need to do is follow the lead of the Italians. Espresso is pretty much the only form of coffee enjoyed in Italy, and they’ve got decades of experience when it comes to perfecting the art of making it.
In most Italian homes, you’ll find a Bialetti Moka stovetop espresso maker. These simple little aluminum contraptions allow you to make espresso with nothing more than coffee grounds, water, and a single burner. Once you get the hang of making espresso in your Bialetti Moka, you might find yourself continuing to use it, even at home.
Bialetti stovetop espresso makers are perfect for camper vans because they have no easily breakable parts, they’re relatively easy to clean, and they only require a stovetop burner to work. Just remember that espresso grinds are very fine, so set your hand grinder to one of its finest settings.
To make espresso, fill the Moka filter with espresso grounds, add the desired amount of water to the base, and set directly on your stovetop over a medium flame. Keep an eye on it and after a short time, espresso will begin to bubble up into the upper chamber and your van will fill with the unmistakable aroma of fresh coffee. When the Bialetti stops making a gurgling noise, the espresso is done brewing. You can take it off the flame, pour, and enjoy.
The 4 Best Ways to Use Your Camper Van Roof Rack
Photo credit: Muse & Co. Outdoors
That’s where a roof rack can come in. A camper van roof rack can expand the capabilities of the vehicle in a variety of ways. The decision whether or not to add a roof rack could mean the difference between being able to take your van on the adventure of your dreams, or not. Keep reading to learn the top 4 ways you can utilize a camper van roof rack to get the most out of your rig.
Add An Awning to Your Camper Van
Awnings are an incredible addition to any camper van. Once you have one, you’ll wonder how you ever took road trips without it! An awning is usually added to the side of your van’s roof above the sliding door. But most awnings can only be mounted if there is a roof rack already in place!
Awnings are such a game-changer that many campervan owners choose to install a roof rack just so they can add one to their rig. Having a convenient area of shade outside of your camper van is a serious boost on hot summer days. And, when the rain starts to come down, you can deploy your awning to keep an area outside of your sliding door dry, which makes it much easier to keep your van clean and free of dirt and mud.
Haul Extra Gear Inside Your Camper Van
Probably the most obvious and common use for a camper van roof rack is to haul extra gear with it. Although camper vans are big vehicles, a lot of van users find themselves in need of some extra space for all their adventure gear. Whether you are a kayaker, surfer, or a family with lots of stuff to bring along, a roof rack can allow you to go on the trips of your dreams without having to leave anything behind.
Bulky Items
Camper van roof racks really shine when it comes to hauling big, bulky pieces of gear. Items like surfboards and kayaks are classic examples of gear that is just too big to fit inside of most camper vans. But just because it can’t fit inside shouldn’t mean you have to give up the activities you love while you’re on the road. With a roof rack and some simple attachments, you can easily bring along hefty gear like kayaks and surfboards.
Extra Stuff
Your camper van roof rack isn’t only good for carrying large items. It can also allow you to mount a cargo basket or rooftop cargo box, both of which are great for stowing smaller belongings. Extra cargo space is a must for many families who are traveling in a camper van, as well as for people on longer adventures who are carrying a lot of gear.
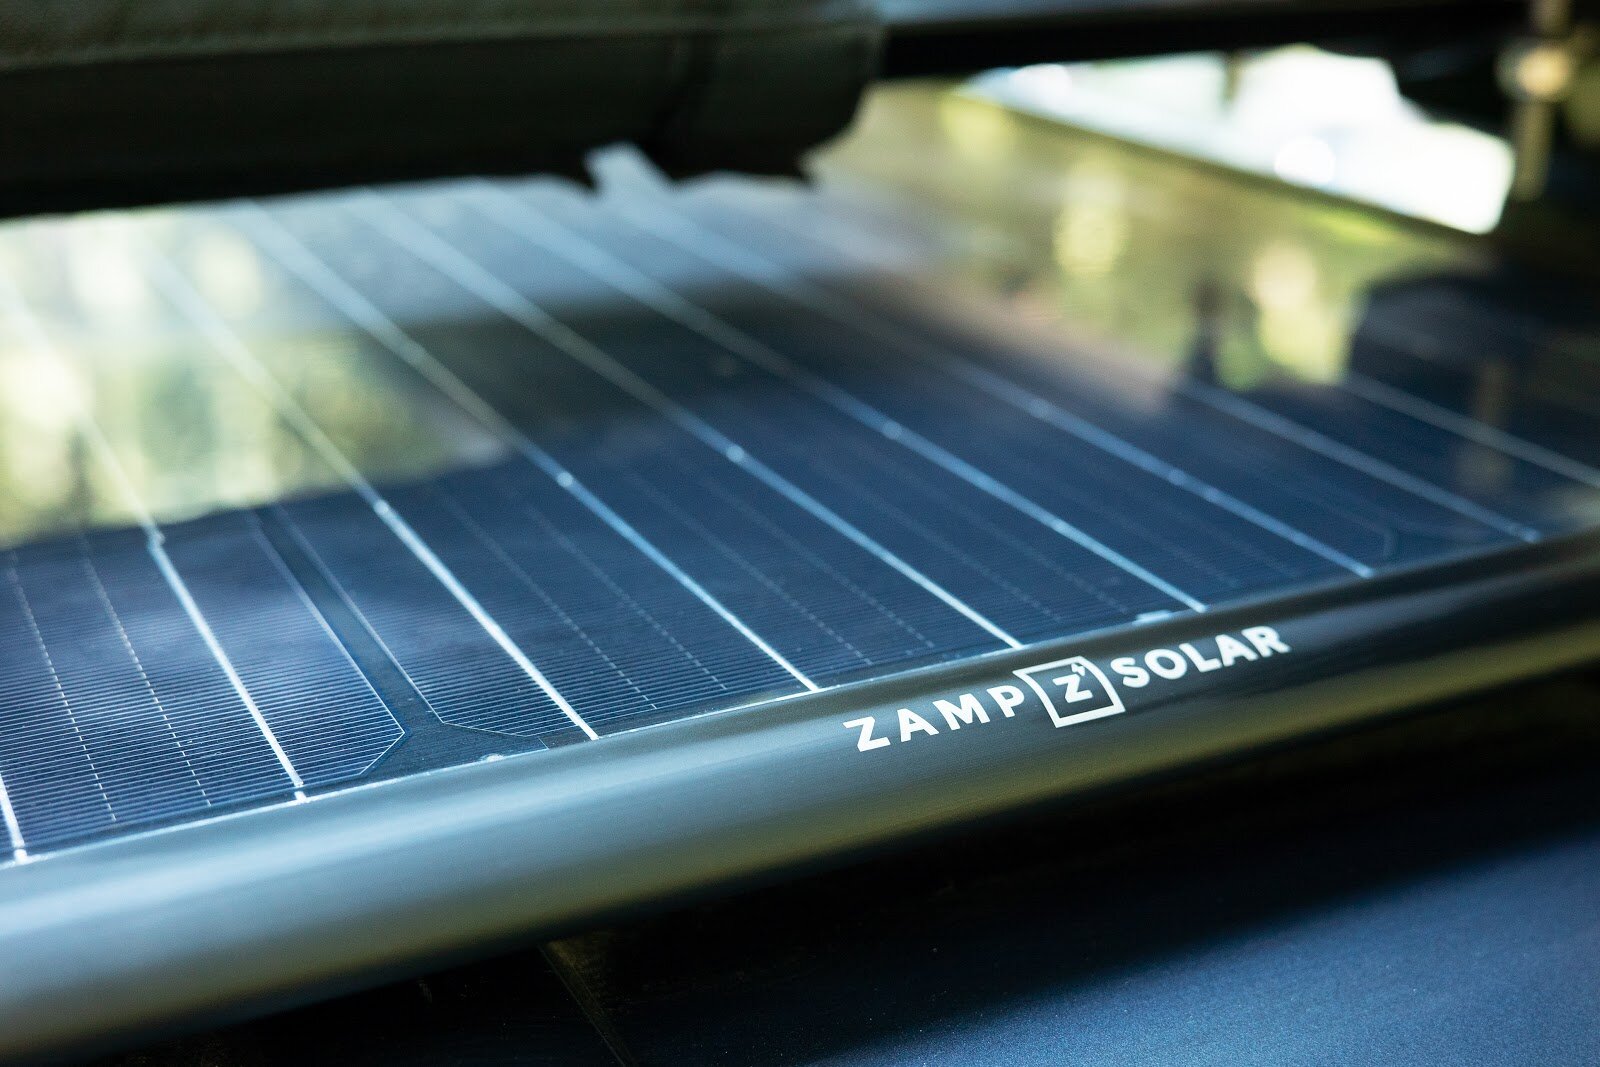
Photo credit: Muse & Co. Outdoors
Mount Solar Panels on Your Camper Van
Solar panels have quickly become the most popular way to charge up camper van batteries. Many camper van owners rely on the sun to power their van’s lights, fridge, fan, and more – as well as to charge their electronics. Naturally, the roof of your van is the best place to mount solar panels, as this is where they will see the most sun exposure.
Unfortunately, camper vans aren’t made with modifications like mounting solar panels in mind. Doing so without a roof rack in place almost always involves drilling holes through the metal of your roof, which can lead to leaks, rust, and other issues. If the panels ever have an issue or need to be replaced, the process can be long and arduous. But with a roof rack, mounting solar panels is a simple process that involves no drilling into the roof of your van. And, performing maintenance or replacing the panels is simple and quick.
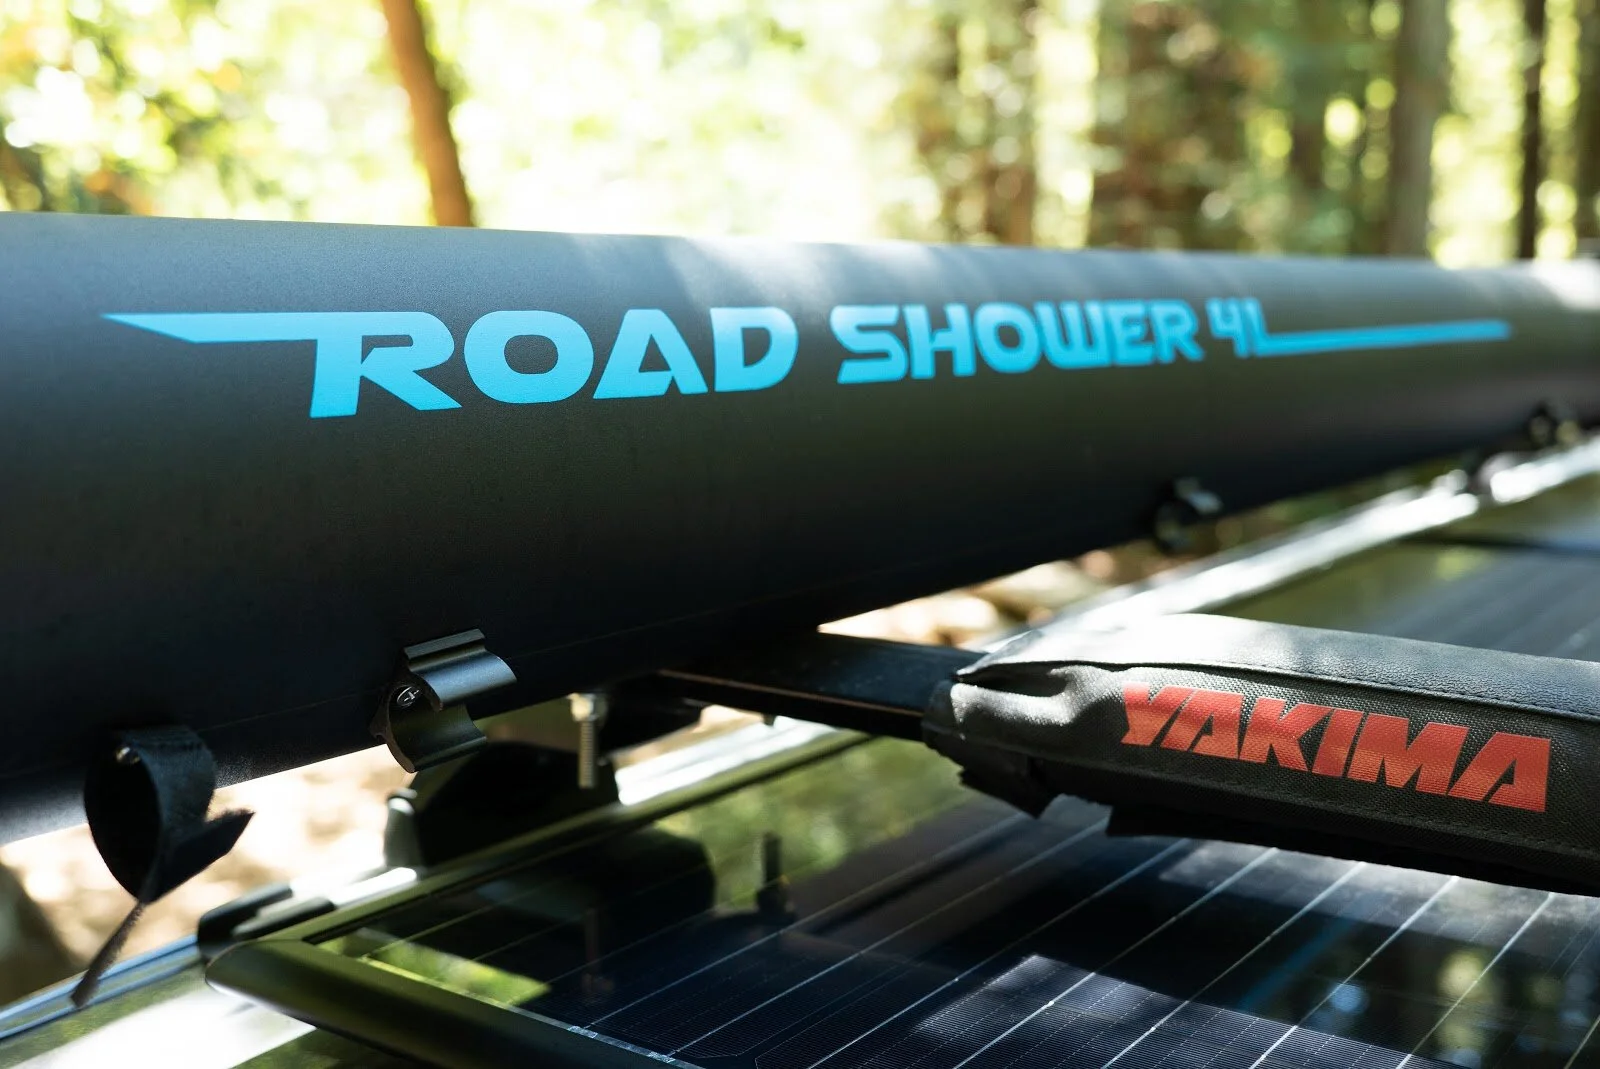
Photo credit: Muse & Co. Outdoors
Mount a Road Shower on Your Camper Van
The Road Shower is a game-changing shower designed specifically for use on campervans. The simple design provides users with on-demand pressurized hot water. Using passive solar heating, the Road Shower only needs sunshine to produce up to 10 gallons of warm water. You can use the shower to rinse off after an afternoon surf, wash dishes, or even clean your muddy dog off before he gets in the van.
The catch? Road Showers require a roof rack to install them on your camper van. But as one of the only ways to have a reliable source of hot, pressurized water on the road without taking from your power supply and interior space, the Road Shower is reason enough on its own to install a roof rack.
Muse & Co. Outdoors offers the option to add a roof rack to your camper van build, complete with any combination of rooftop accessories you desire. Head over to our Options & Accessories page to learn more!
